Data Marts
Zus data marts provide a SQL-friendly, relational view of Zus FHIR data, refreshed daily and designed for analytics, reporting, and population-level analysis.
Best for
- BI dashboards and reporting
- Population health analytics
- Cohort analysis
- SQL-based exploration
Not ideal for
- Real-time workflows
- Use cases requiring strict referential integrity or sub-hour freshness
For real-time or transactional access, use the Zus FHIR APIs or Zushooks.
Why data marts?
FHIR is optimized for transactional workflows—reading or writing a single resource or patient record at a time. This makes it ideal for interoperability and real-time data exchange, but less suitable for analytics.
FHIR data is:
- Deeply nested JSON
- Highly normalized
- Optimized for point-in-time reads
Analytics platforms, on the other hand, work best with flat, relational data that can be joined and aggregated efficiently.
Zus data marts bridge this gap by extracting and transforming FHIR data into a relational schema optimized for SQL-based exploration and analysis.
Getting familiar with Zus data marts
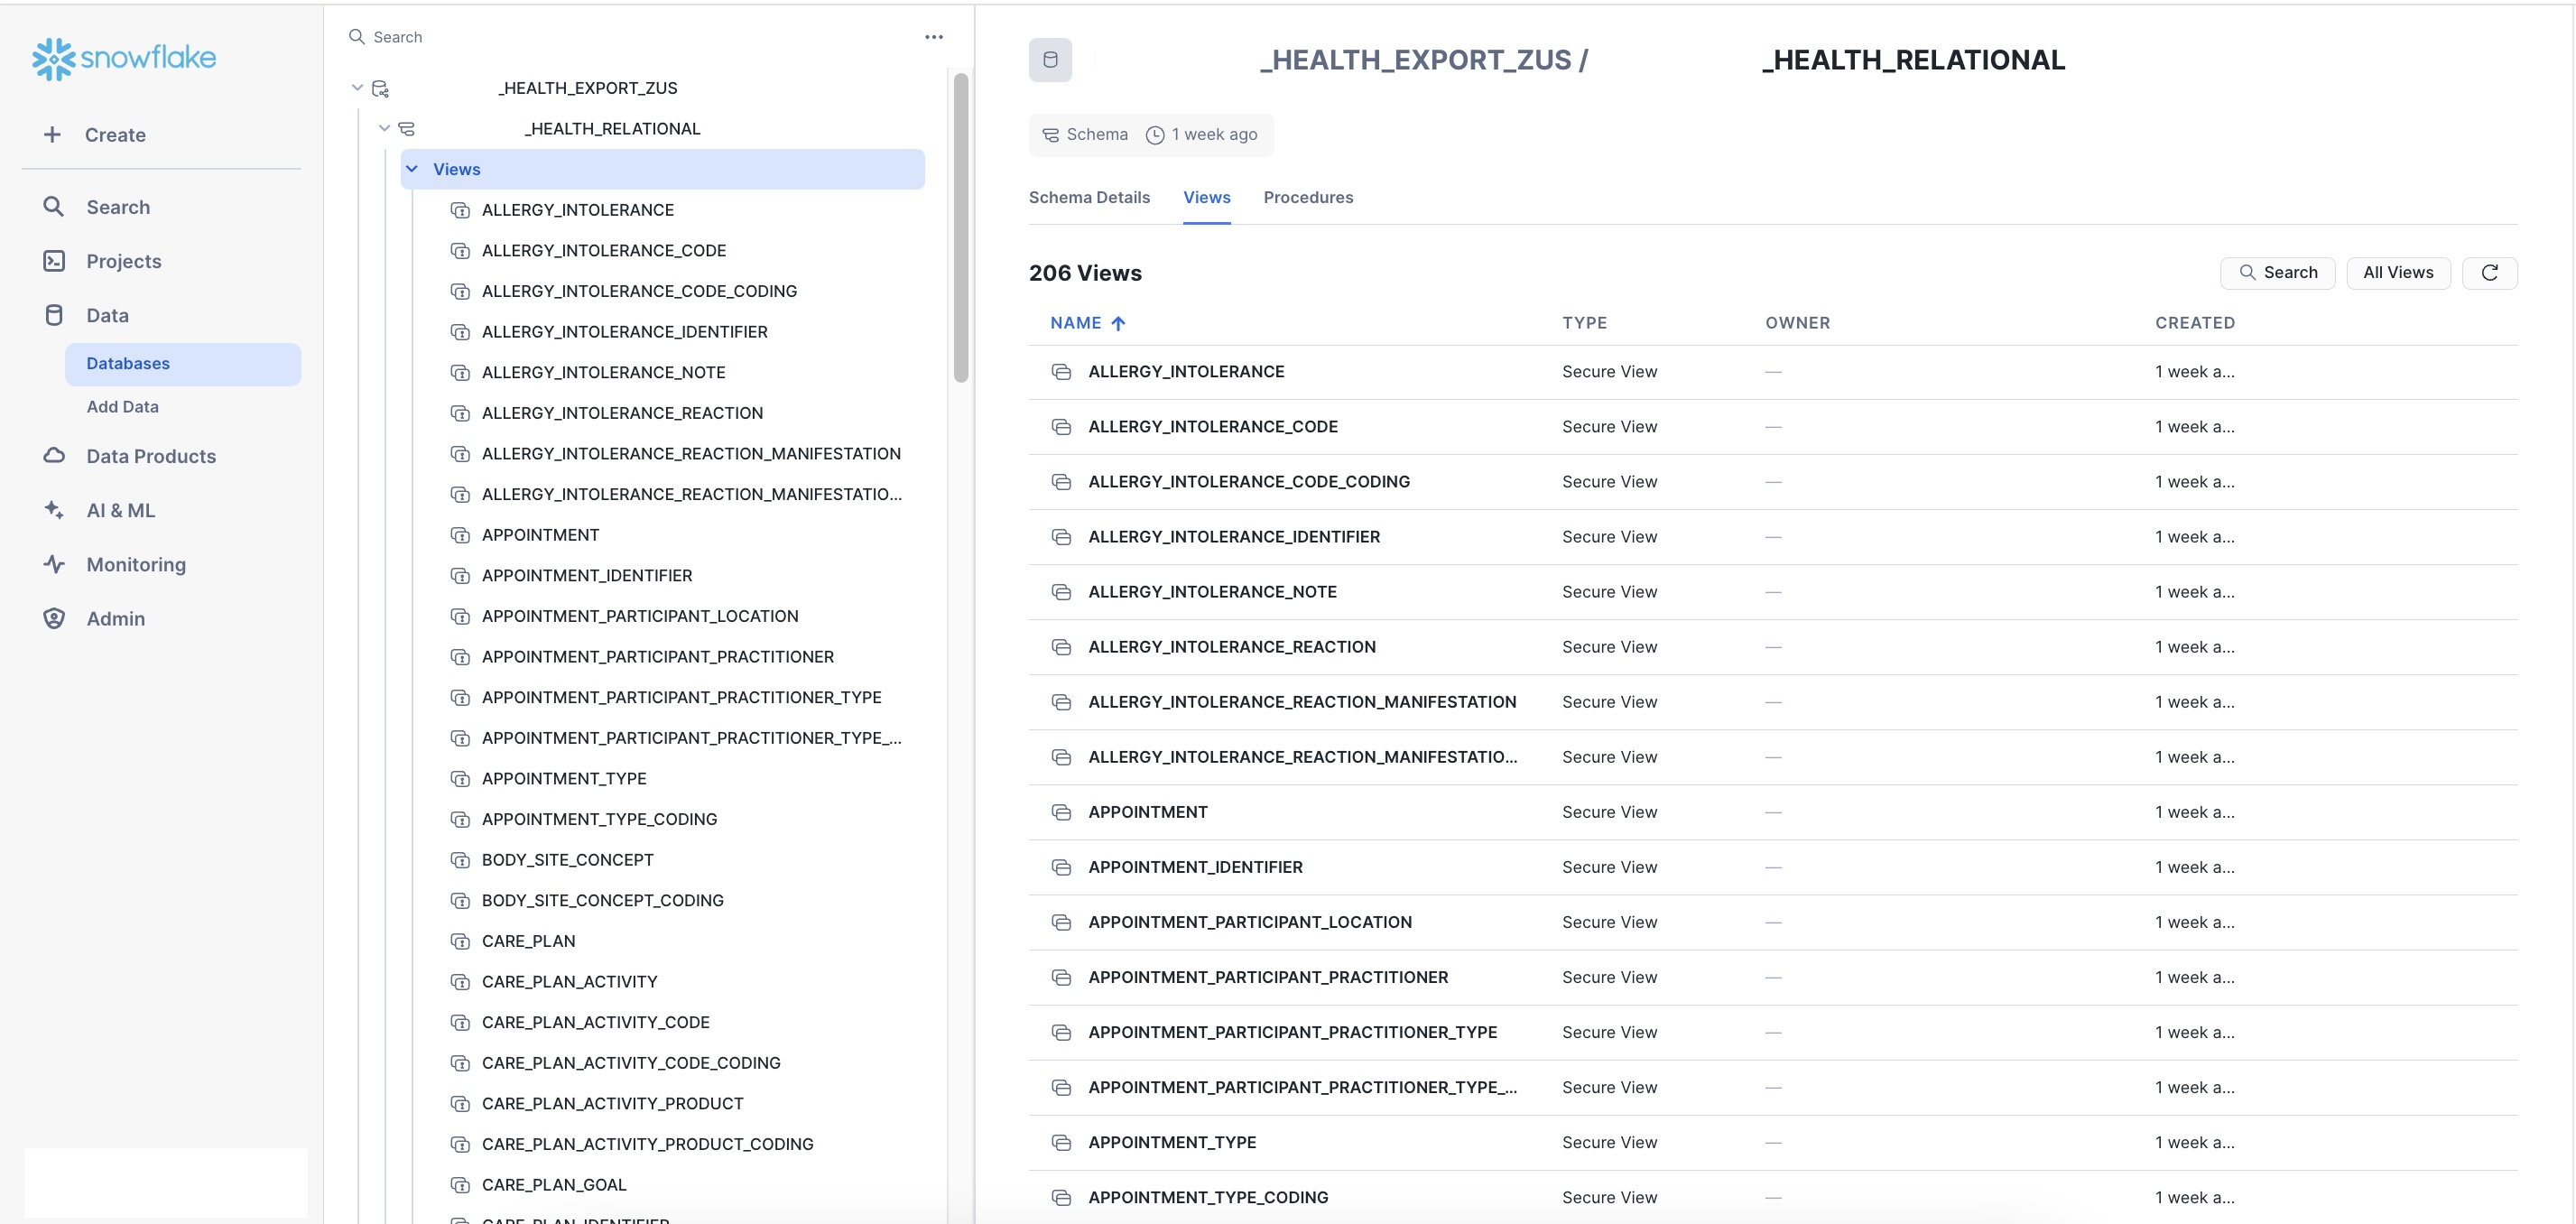
If you are accessing Zus data marts via Snowflake, you can explore all available tables directly in the Snowflake UI.
Finding your tables in Snowflake
- Click Data in the left sidebar
- Open the database:
{COMPANY_NAME}_EXPORT_ZUS - Expand the schema:
{COMPANY_NAME}_RELATIONAL - Click Views
You should see approximately 200 relational views, representing FHIR resources, Lens data, and shared data types.

For more detailed reference material, see:
Supported FHIR resources
The following FHIR resource types are exported as data mart tables.
Clinical data
- AllergyIntolerance
- Condition
- DiagnosticReport
- DocumentReference
- Encounter
- FamilyMemberHistory
- Goal
- Immunization
- Observation
- Procedure
Medications
- Medication
- MedicationAdministration
- MedicationDispense
- MedicationRequest
- MedicationStatement
Administrative & demographic
- Patient
- Practitioner
- Organization
- RelatedPerson
- Coverage
- Consent
- CarePlan
- CareTeam
- Appointment
- Location
- Device
- DeviceUseStatement
Each resource is represented as a relational table (with related child tables where applicable).
Table types
Zus data marts expose three categories of tables derived from the Zus Aggregated Profile (ZAP)—a curated, longitudinal patient record assembled from first-party data, Lens summaries, and third-party networks.
How to think about table types
- Base FHIR tables: Relational representations of raw FHIR resources
- Lens tables: Zus-curated, summarized clinical insights
- Data type tables: Reusable FHIR data structures referenced by other tables
Most analytics queries start with Base FHIR or Lens tables and only join data type tables when needed.
Table Type | Description | Examples |
|---|---|---|
Base FHIR resource | • Includes first-party and third-party data | PATIENT |
Lens | • Includes only Lens data | LENS_RXNORM_MEDICATION_STATEMENT |
Data type |
| CONTACT_POINT |
Data sources
Every Base FHIR resource table includes a DATA_SOURCE column that indicates where the data originated.
-
DATA_SOURCE IS NULL
→ First-party data written and managed by your organization (including Zus EHR integrations) -
DATA_SOURCE IS NOT NULL
→ Third-party data sourced from the Zus network
Common DATA_SOURCE values include:
- EHR networks: commonwell, carequality
- Pharmacy: surescripts
- ADT notifications: bamboohealth, collective-medical, manifest-medex, eden, florida-hie
- Labs: quest
This enables source-aware analytics, such as separating internally documented conditions from externally sourced ones.
Universal patient identifier (UPID)
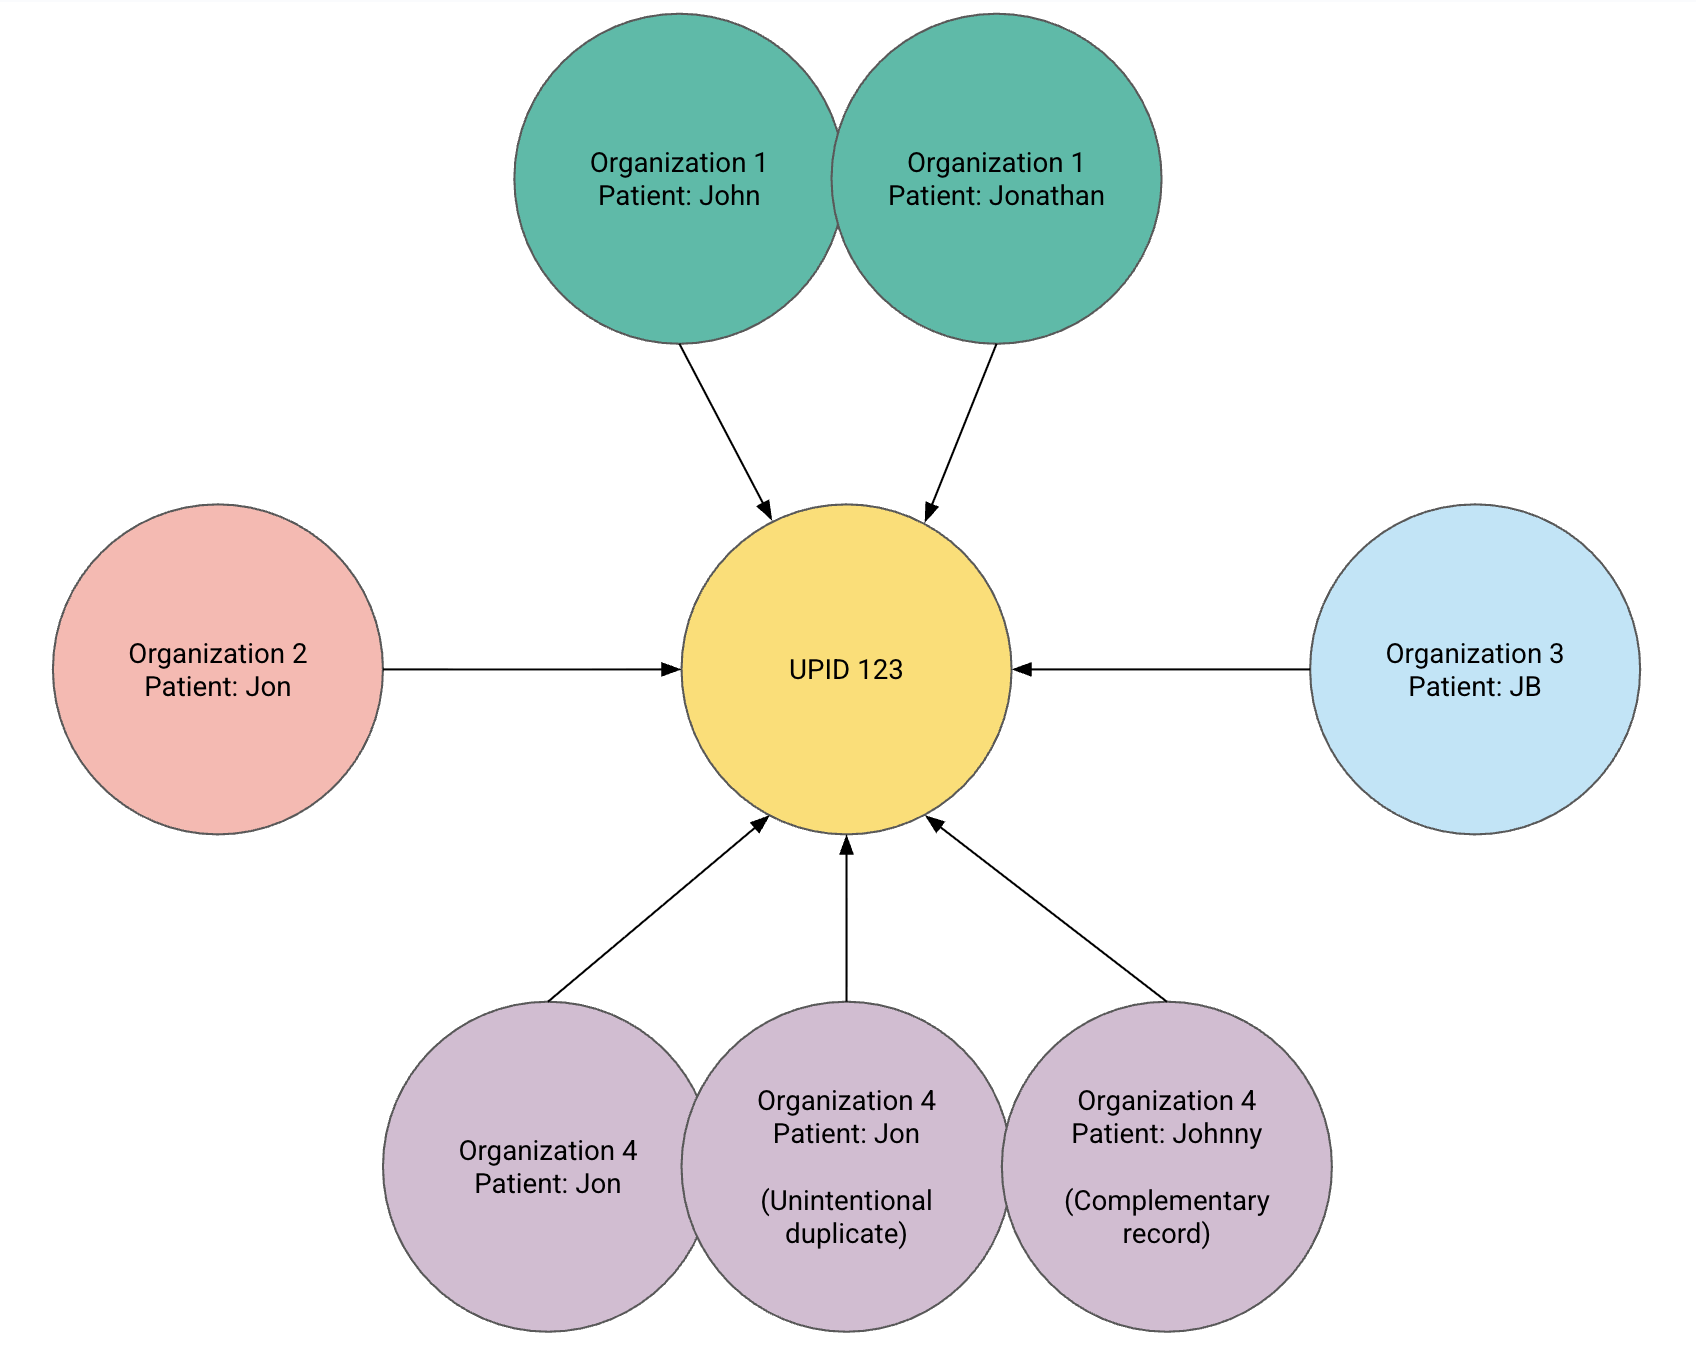
Zus provides an identity resolution service called the Universal Patient Index to link duplicate patient records across systems and data sources.
How UPID works
Each FHIR Patient resource represents one source-specific copy of a person’s data. A single human may therefore have multiple Patient resources in Zus, sourced from different networks or organizations.

Every row in the PATIENT table has a unique Patient ID
- All Patient records that represent the same human share the same UPID
The UPID column is available on:
- All Base FHIR resource tables
- All Lens tables
Exceptions: Location, Medication, Practitioner, and Organization.
Best practice: Use
UPIDas the primary identifier for patient-level analytics and aggregations.
Your data mart only includes data for patients for whom your Builder organization has an active treatment relationship.
Exploring the data
To start querying your data mart in Snowflake:
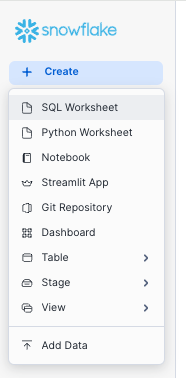
- Click + Create in the left sidebar
- Select SQL Worksheet
.

Let's run a simple query to count the number of distinct patients included in the data mart and click the blue play button on the top right to execute.
select
    count(distinct upid)
from patient
🥳 Congratulations! You completed your first query on the Zus data mart!
For additional tutorials on analyzing Zus data, we recommend checking out our query library.
Additional details
Data mart refresh behavior
Zus data marts refresh continuously throughout the day, with all tables updated at least once daily. Refreshes occur on a rolling basis rather than as a single atomic update.
Standard refresh (≤ 24 hours)
Most data mart tables reflect changes in the Zus platform within 24 hours of an update.
This includes the latest version of each FHIR resource for your patient population.
Accelerated refresh (≤ 3 hours)
The following parent FHIR resource tables have a reduced target latency of approximately 3 hours:
- Condition
- Device
- DocumentReference
- Encounter
- EpisodeOfCare (presented as
LENS_TRANSITION_OF_CARE) - Location
- Organization
- Patient
- Practitioner
Important: This reduced latency applies only to the parent tables listed above. Related child tables (for example,
CONDITION_CATEGORYorCONDITION_CATEGORY_CONDITION) continue to refresh on a 24-hour cadence.
Rolling updates and referential integrity
Because data mart tables update on a rolling basis throughout the day, referential integrity is not guaranteed at every point in time. Temporary join mismatches across tables are expected and should be accounted for in analytical workflows.
For use cases where freshness or referential integrity is critical, we recommend using:
These interfaces reflect updates as soon as a FHIR resource is changed on the Zus platform and are better suited for time-sensitive workflows.
Data marts versioning
Zus will update the relational schema to keep up with customer needs and data quality best practices, while aiming to minimize disruption.
Compatibility guarantees
- Zus will ensure that changes made within an existing schema version are non-breaking.
- If a breaking change is required, it will be introduced in a new schema version.
- Each generally available (GA) schema version will be supported for a minimum of 9 months.
- Customers will be given at least 60 days to transition to a new GA version once it is available.
- Zus reserves the right to introduce a breaking change without notice if it impacts an unused feature of the data mart.
Stay tuned for updates and detailed release notes with each new version.
What is a breaking change?A breaking change in a data mart schema disrupts existing functionality or requires users to alter how they interact with the data mart. These changes can impact data querying, processing, or interpretation, necessitating adjustments to reports, dashboards, or applications relying on the schema.
Examples of breaking changes include:
- Schema modifications:
- Changing the name of an existing column or table
- Removing an existing table or column
- Data type changes:
- Altering the data type of an existing column (e.g., from integer to string)
- Constraint changes:
- Modifying or removing primary keys
- Modifying or removing foreign key relationships
- Adding or removing unique constraints
Note: Adding a column or table or reordering existing columns within a table does not constitute a breaking change.
Updated 10 days ago
